

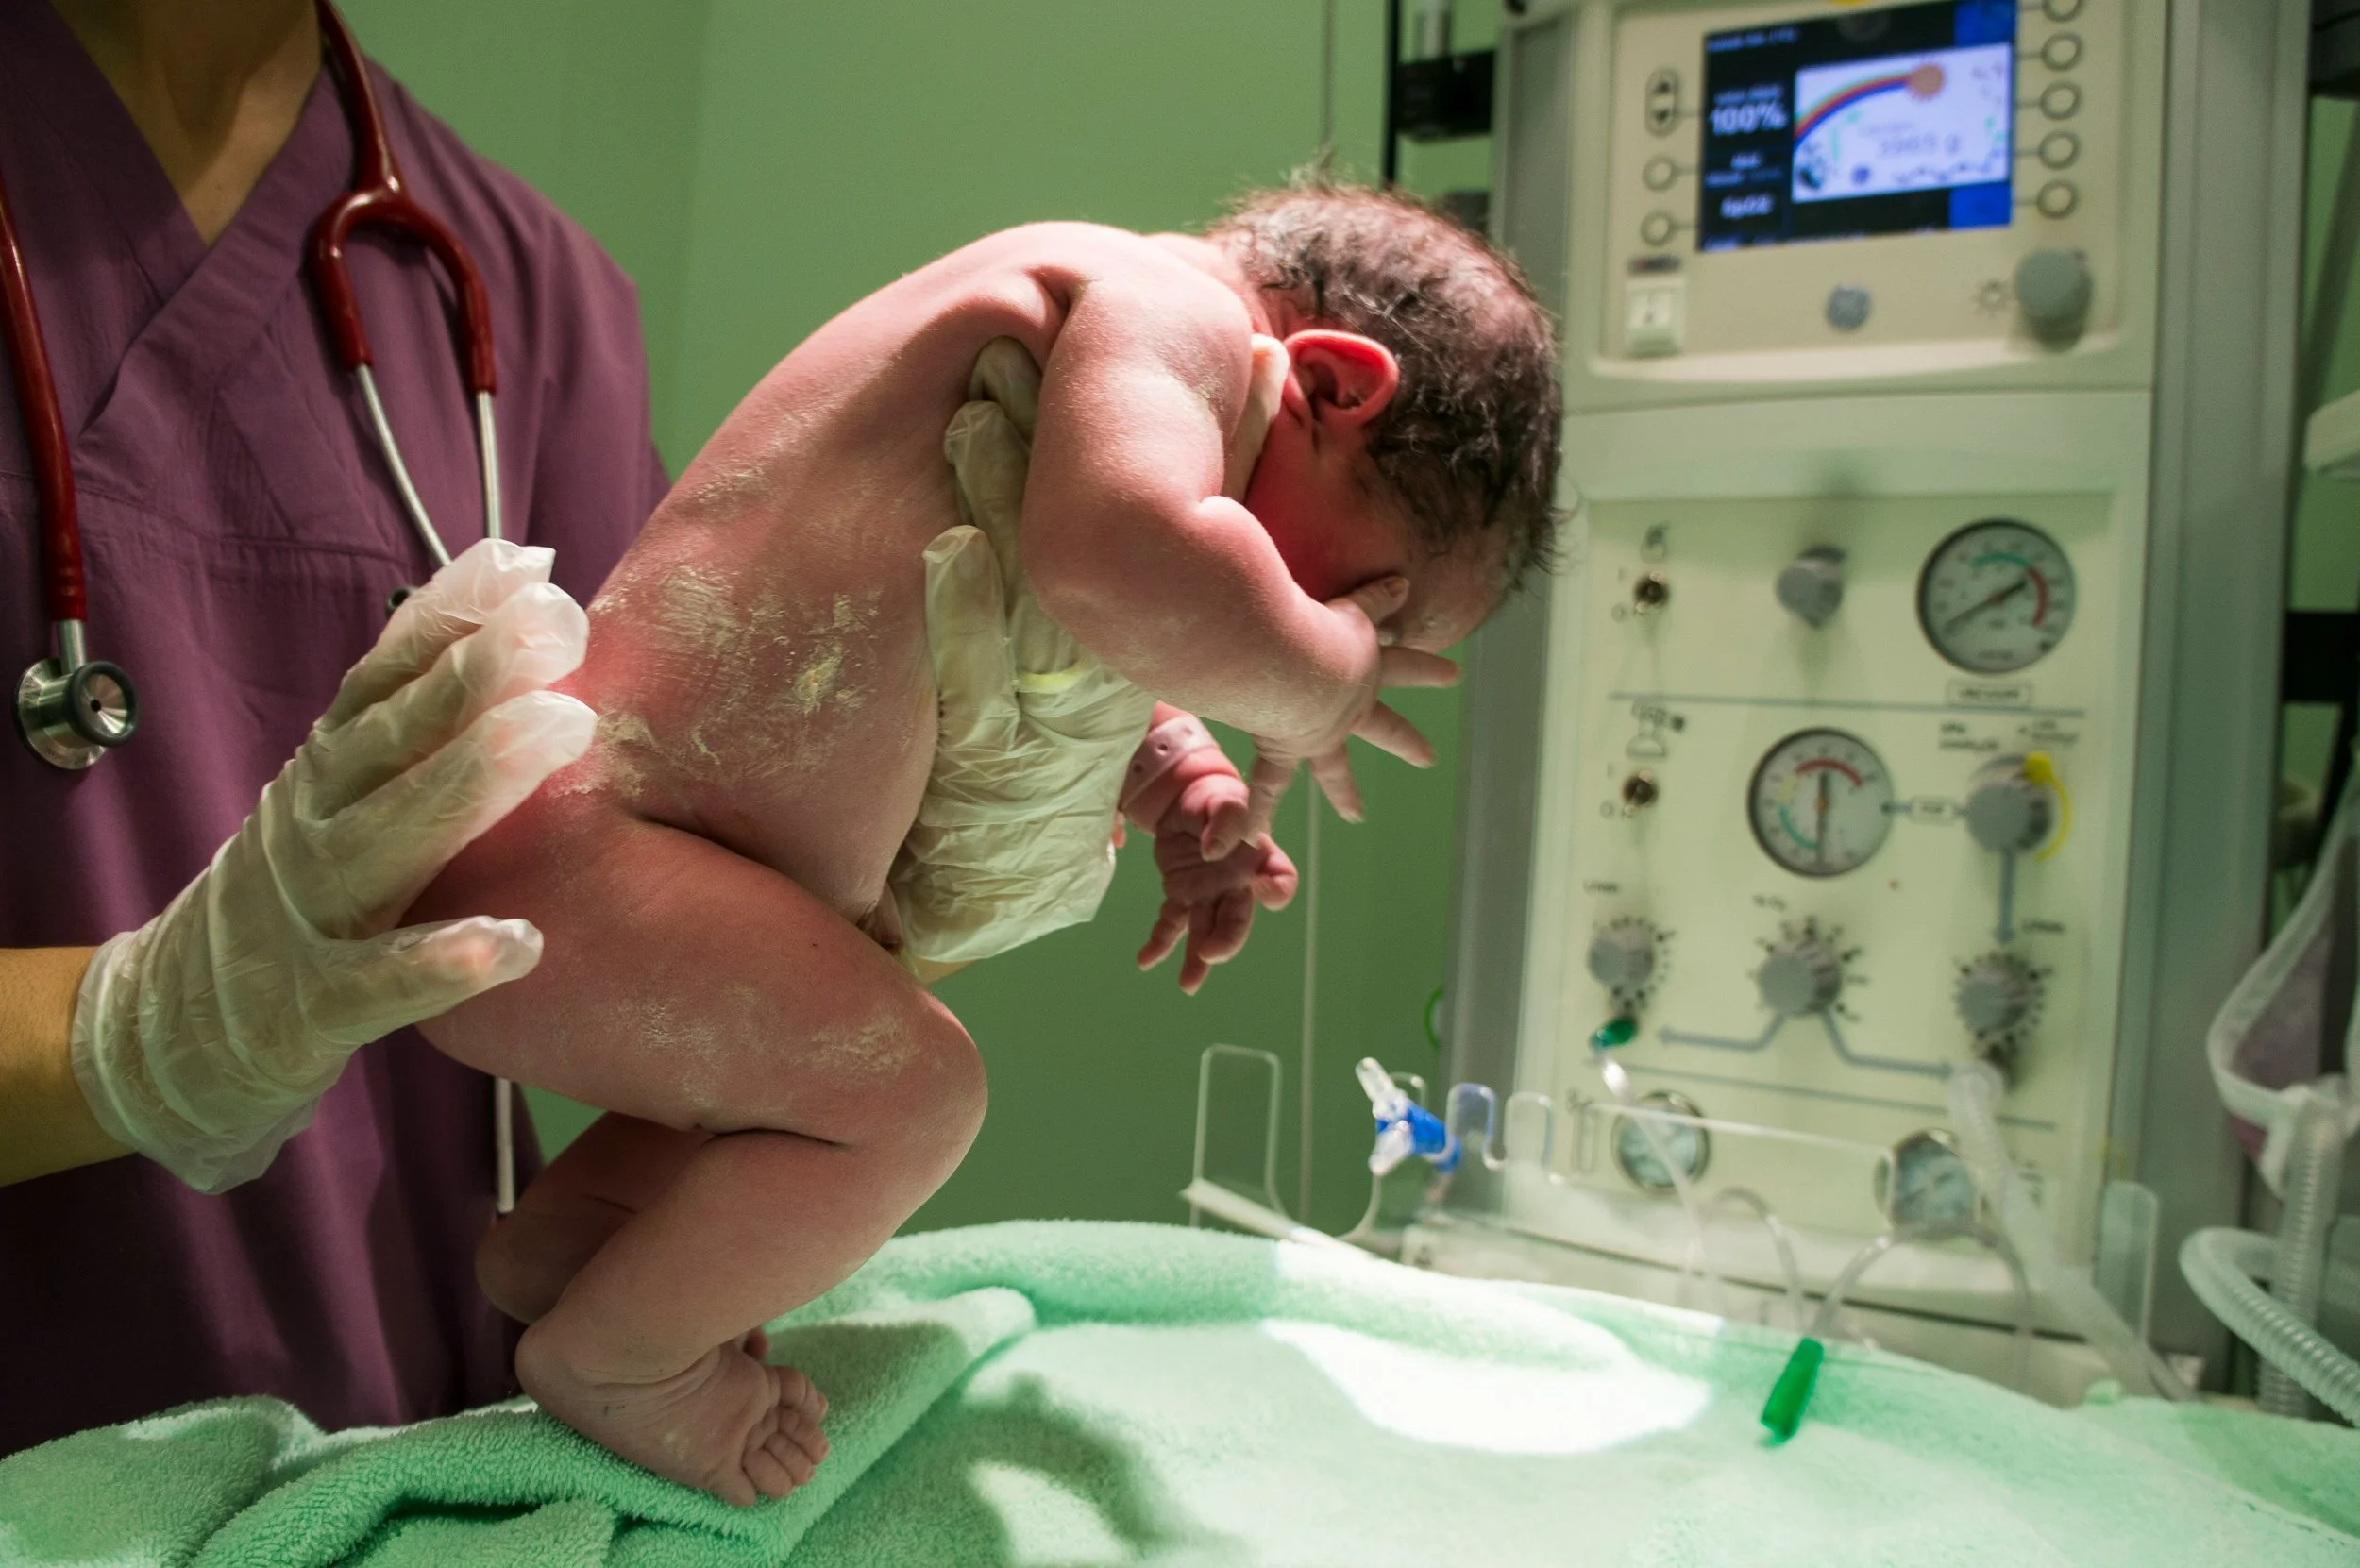
Do I Need a Doula for Home Birth?
If you are planning a home birth, you likely trust in your body’s ability to birth your baby and receive quality continuity of care from your midwife. So when someone suggests hiring a doula, your first thought might be: Do I really need one?
The short answer? No one truly NEEDS a doula, the same way you don’t “need” a birth tub, a TENS unit, or even the presence of your partner to be able to birth your baby.
But doulas make a profound impact at any birth, including home birth, even for seasoned moms. Every woman has everything she needs to give birth, but the presence of a doula can make the experience That. Much. Better.

What Is a Doula, Exactly?
A doula is a trained professional who provides continuous emotional, physical, and informational support during pregnancy, labor, and the early postpartum period. Unlike a midwife, a doula doesn’t provide medical care or deliver the baby. Instead, their role is to support you—to help you feel calm, confident, and cared for through every wave of labor.
Isn't That What My Midwife Does?
Not quite. Midwives are incredible. They bring clinical expertise and often a deeply nurturing presence—but their primary responsibility is monitoring the health and safety of you and your baby. Depending on how your labor unfolds, your midwife may spend time charting, assessing your vitals, or focusing on specific clinical needs. They likely won’t be with you every minute of your labor.
A doula, on the other hand, is there only for you—rubbing your back, reminding you to drink water, breathing with you, holding your hand, helping your partner support you better. Their whole focus is helping you stay grounded and supported.
Why Consider a Doula for a Home Birth?
Here are some specific reasons why families planning a home birth often choose to hire a doula:
1. Uninterrupted Support From the Start
Your doula can join you as soon as labor starts intensifying—often even before your midwife arrives. That early support can be especially comforting as you settle into your labor rhythm at home.
2. Hands-On Comfort Measures
From hip squeezes and counter pressure to warm compresses and position changes, doulas are experts in comfort techniques that ease intensity and encourage progress.
3. Support for Your Partner
Doulas don’t replace partners—they empower them. A doula can offer suggestions, reassurance, and breaks so your partner can stay emotionally present without burning out.
4. Emotional Reassurance
Even in a familiar setting, labor can bring moments of fear or doubt. A doula is trained to help you navigate those moments with grounding, encouragement, and presence.
5. Continuity in Case of Transfer
If your home birth plan shifts and you transfer to a hospital, your midwife may or may not accompany you. A doula often will, continuing their role as your consistent support person through the entire experience.
What If I Already Have a Supportive Partner?
That’s wonderful! Doulas don’t replace loved ones—they enhance their ability to support you. Many partners share afterward how grateful they were for the doula's guidance: where to press, how to speak affirming words, when to rest or eat. Think of your doula as a partner for both of you.
Choosing the Right Doula for Your Home Birth
If you're planning a home birth in Cincinnati, it's important to choose a doula in the area who is familiar with out-of-hospital birth settings. Look for someone who:
Respects and understands midwifery care
Supports physiologic birth without unnecessary interventions
Is comfortable in a home environment (and can go with the flow if birth happens in the tub, on the floor, or anywhere else!)
Communicates well with your midwife
Is someone you feel comfortable with
Not sure where to start? Ask us at the Cincinnati Birth Center for our recommendations!
So, Do You Need a Doula?
You may not need a doula the way you need your midwife—but having one might be one of the best decisions you make for your birth. Think of it like this: home birth is already about creating the most supportive, empowering environment possible. A doula helps deepen that experience by offering comfort, connection, and care tailored just to you.
In the end, whether or not you hire a doula is a personal choice—but it’s one that most home birthing families never regret.
Ohio Birth Statistics vs. United States Averages

Birth Complications
Infant Mortality
According to March of Dimes, Ohio’s infant mortality rate was 7.1 deaths per 1,000 live births in 2023, compared to the U.S. average of 5.6, placing Ohio at 43rd among all states.
Nationally, the U.S. infant mortality rate is about 5.1 per 1,000 live births as of 2024, ranking the country low in international comparison—173rd according to the CIA World Factbook.
Preterm Births & Low Birth Weight
Ohio’s preterm birth rate in 2023 stood at 10.7%, slightly higher than the nationwide goal of around 8.1% and higher than many peer states .
Among Medicaid-covered births, Ohio’s preterm rate is even higher (~12.8%) and Ohio ranks among the ten worst states for low birth weight in Medicaid populations.
Cesarean (C‑Section) Rates
In 2023, Ohio’s C‑section rate was 31.5%, slightly below the national average of 32.4%.
Low-risk first-time deliveries have Ohio’s rate at ~14.7%—far lower than overall C‑section rates, but still above midwifery-attended rates.
Maternal Complications & Mortality
Ohio’s maternal mortality rate is slightly above the national average (~24.5 vs. 23.2 per 100,000 births).
Hamilton County: Infant Mortality Uptick in 2024
In Hamilton County, the infant mortality rate rose from 5.5 per 1,000 live births in 2023 to 6.8 in 2024. 34 deaths were related to preterm birth, a nearly 55% increase from 2023.
The Black infant mortality rate in Hamilton County jumped from 9.0 to 13.7 per 1,000—still about 3.5 times higher than the White infant mortality rate, demonstrating persistent racial disparities.
National Use of Midwives vs. Ohio
National Midwifery Trends
As of 2021, about 12% of U.S. births were attended by midwives, up from 9.6 in 2016.
Midwife-attended low-risk hospital births are linked with a ~30% lower risk of C-sections compared to physician-only care, according to the Access to Midwifery Care National Chartbook.
Ohio Midwifery Statistics
In Ohio in 2021, 10.6% of births were attended by midwives
This is just slightly below or on par with national rates. However, Ohio only legally licenses CNMs which limits the workforce compared to states that license both. Certified Professional Midwives (CPMs) operate in a legal gray area and are currently working toward state licensing.
Access to Midwifery Care
Approximately 14.8% of Ohio’s counties are maternity care deserts (no obstetric provider or facility).
Still, 3.2% of Ohio births occur in these deserts, and rural women face longer travel (9.2 miles average) to birth hospitals.
Midwifery, Outcomes & Disparities
Lower Intervention and Better Outcomes
Midwife-led care is associated with lower C‑section rates (~5% in midwife-attended cases vs. ~30% statewide in Ohio), lower preterm and low birth weight, and greater breastfeeding initiation.
Given Ohio’s elevated preterm birth and infant mortality rates, especially among Black infants, expanding accessible, low-intervention care may help reduce those outcomes.
Access & Equity
Ohio’s limited midwifery workforce and moderate midwife-attendance rates currently constrain broader impacts, especially in rural and underserved areas.
In maternity care deserts, lack of accessible care disproportionately affects women of color and low-income families, who also experience worse outcomes. State-level policies to license more midwife types and expand Medicaid reimbursement could improve equity.
Offering more midwifery-led, accessible prenatal and birth care—especially in underserved communities—holds real potential to reduce preterm births, lower infant mortality, and shrink racial disparities in Ohio. Strengthening midwifery workforce and policy infrastructure could be a powerful lever for healthier births across the state.
Home Births and Birth Centers by the Numbers
Over the past several years, more and more families across the U.S. have started asking the same question:

“Do I have to give birth in a hospital?”
The answer? Not necessarily.
If you're expecting a low-risk pregnancy and want a more personal, low-intervention birth experience, home birth or birth center birth with a midwife might be a great fit. And you're not alone-more families than ever are choosing this path. Let’s take a look at the numbers, the trends, and what research is telling us about the safety, satisfaction, and outcomes of out-of-hospital birth.
Home Birth Is on the Rise
According to the CDC, home births increased by 12% in 2022 - the highest rate in over three decades. In some rural areas, that percentage is even higher.
Why the increase? Families are:
Looking for a more natural, hands-on approach to birth
Wanting fewer medical interventions
Hoping for more autonomy and support
Reconsidering hospital birth due to the COVID-19 pandemic and visiting restrictions
For many, a planned home birth with a qualified midwife offers a safe, peaceful, and empowering alternative to a hospital setting.
Birth Centers Are Growing, Too
Birth centers are freestanding facilities (not part of a hospital) that offer a cozy, home-like space for giving birth with skilled midwives. They’re ideal for people who want:
A natural birth experience
Access to water birth
A setting that’s not “clinical” but still has safety protocols in place
According to the American Association of Birth Centers:
There are now over 400 birth centers in the U.S., and that number is growing
Over 90% of clients avoid cesarean birth at birth centers
Clients report high satisfaction and lower healthcare costs
For many families, birth centers provide the “best of both worlds” - comfort and control, with expert support nearby.
Midwives Are Attending More Births
Midwives are the trained professionals who provide care in birth centers and at home (and often in hospitals too!). In the U.S., midwives attend around 10% of all births - and that number continues to rise.
Research shows that midwifery care is linked to:
Lower rates of induction, cesarean, and other interventions
Better breastfeeding outcomes
Higher satisfaction with the birth experience
Fewer complications for low-risk pregnancies
Midwives also provide continuity of care, which means you’re more likely to know the person attending your birth - and have built a trusting relationship with them.
Are Home and Birth Center Births Safe?
For low-risk pregnancies, the research says yes.
Studies have shown that planned out-of-hospital births with trained midwives have:
Lower intervention rates (like inductions and cesareans)
Fewer infections and complications
High levels of maternal satisfaction
Comparable outcomes to hospital birth when there’s a clear plan for emergency transfer, if needed
In fact, countries like the Netherlands, the U.K., and Canada - where midwifery and out-of-hospital birth are more integrated-have excellent maternal and neonatal outcomes.
What About Cost?
One major benefit of home and birth center birth is the lower cost - without sacrificing quality.
Birth center births typically cost 30-50% less than hospital births
Home births can cost even less, depending on the provider and insurance coverage
Some birth centers now accept insurance or Medicaid (check with your local center)
The Big Picture
The growing interest in home birth, birth centers, and midwife-led care isn’t just a trend - it’s a shift toward respectful, evidence-based, and family-centered birth. More people are realizing that they have options-and they’re choosing care that aligns with their values, not just what’s been expected.
And the numbers? They’re telling a powerful story:
Out-of-hospital birth is safe, effective, and deeply meaningful for many families.
Interested in learning more or touring the Cincinnati Birth Center?
Our team would love to answer your questions and help you explore your birth options with confidence and support. Schedule a tour today!
Breast Pumping Tips and Tricks

If you're thinking about breast pumping - whether it’s to go back to work, share feedings with a partner, or just have a little flexibility - you’re not alone. Pumping can be a super helpful tool for many parents, but starting can feel a little overwhelming. What kind of pump do you need? When should you even begin? What does the process actually look like day to day?
Choosing a Breast Pump (Don’t Forget to Check Your Insurance!)
Before buying a pump, check with your insurance provider - most insurance plans will cover at least one pump, and sometimes even replacement parts or upgrades. See which brands they offer and do some research to find out which one is the best for you.
A few common pump types:
Double electric pump – Great if you plan to pump regularly or are going back to work. These pumps can do both sides at once and tend to be more efficient.
Wearable or hands-free pump – These fit right in your bra (think Elvie or Willow) and are super convenient for multitasking. They’re more discreet but often not quite as strong as a traditional electric pump.
Manual pump – Simple, quiet, and budget-friendly. Good for occasional pumping or for keeping in a diaper bag.
Hospital-grade pump – Very powerful and helpful if your baby is in the NICU or if you're working to establish or increase your supply. These are usually rented short-term.
💡 Pro tip: Make sure the flange (the part that goes on your breast) fits you properly! It makes all the difference in comfort and milk output.
When Should You Start Pumping?
This really depends on your situation and what your goals are. There’s no one “right” answer here.
If your baby is in the NICU or isn’t nursing well yet: You’ll want to start pumping soon after birth - ideally within a few hours - to help establish your milk supply.
If you’re breastfeeding and want to introduce a bottle: Ideally you’ll wait about 4–6 weeks, or until breastfeeding feels well established.
If you’re going back to work: Starting to pump about 2-3 weeks before your return can help you get comfortable with your pump and build a little freezer stash. This will also give baby time to get used to a bottle before you return to work.
If you’re exclusively pumping: You’ll be pumping 8-12 times in 24 hours at the beginning, mimicking how often a newborn would nurse.
What Pumping Actually Looks Like
Okay, let’s be honest. Pumping isn’t always glamorous. It can be a bit repetitive and time-consuming, especially at first - but it can also be totally doable once you get into a rhythm.
Here’s what a typical session looks like:
Set up your pump and make sure everything’s clean and ready.
Sit down (or multitask if you’re hands-free!), relax, and pump for 15–30 minutes.
Pour your milk into storage bags or bottles, label it, and get it into the fridge or freezer.
Clean your parts so they’re ready for next time.
A few tips:
Set up a cozy pumping spot with water, a snack, your phone, a book - whatever helps you feel relaxed.
Hands-free bras are a game-changer. Seriously.
You might not get a ton at first, and that’s totally normal. Milk supply can fluctuate based on the time of day, your hydration, and even your stress levels.
You don’t need a huge freezer stash. Don’t feel pressured by other moms posting their giant freezer full of milk bags. Just a few days’ worth is usually plenty.
Don’t forget to breathe. You're feeding your baby and taking care of yourself, and that’s a big deal.
There’s no perfect way to pump, and no gold star for doing it all. Whether you pump once a day, exclusively pump, or do a little of both - what matters most is that it works for you and your baby.
Give yourself some grace as you figure it out. It might take a little time to settle into a routine, but you’re not doing it wrong if it feels awkward at first. That’s totally normal.
And remember - you’re doing a beautiful job.
Summer Pregnancy Tips: Stay Cool and Beat the Swelling

Being pregnant in the summer has its perks—hello sunshine, maxi dresses, and fresh fruit—but it can also bring unique challenges. Rising temperatures and increased humidity can intensify common pregnancy symptoms like swelling, fatigue, and dehydration. If you’re expecting during the hottest months of the year, a little preparation and self-care can go a long way in helping you stay comfortable and healthy.
Here are some tried-and-true tips for surviving (and maybe even enjoying!) a summer pregnancy.
1. Stay Hydrated—Then Hydrate Some More
When you’re pregnant, your body needs extra fluids to support increased blood volume and amniotic fluid levels. Add in summer heat, and staying hydrated becomes even more important.
Tips:
Aim for 8–12 cups of water daily—and more if you’re sweating.
Infuse your water with cucumber, lemon, mint, or berries to make it more appealing.
Keep a reusable water bottle with you at all times.
Snack on water-rich foods like melon, cucumber, oranges, and strawberries.
Watch for signs of dehydration: dry mouth, dizziness, headaches, dark urine, or infrequent urination. If you’re feeling off, rest in a cool space and rehydrate right away.
2. Cool Down Your Environment (and Yourself)
Pregnancy raises your body temperature slightly, making summer feel extra hot. Overheating can lead to fatigue, swelling, or even early contractions, so take steps to stay cool.
Tips:
Spend time in air-conditioned spaces during the hottest parts of the day.
Use a cooling towel, misting fan, or ice packs on your neck and wrists.
Wear lightweight, breathable clothing—natural fibers like cotton and linen are your best friends.
Take cool (not cold) showers or baths to lower your body temp.
Sleep with a fan and keep a glass of water by your bed.
If you feel overheated, dizzy, or nauseous, stop what you're doing and rest in the shade or indoors.
3. Beat the Swell: Managing Water Retention
Swelling—especially in the ankles, feet, and hands—is common in pregnancy and can worsen in summer heat. It’s usually harmless, but can be uncomfortable.
Tips:
Elevate your feet when sitting or lying down.
Avoid sitting or standing for long stretches without moving.
Try gentle movement like walking or swimming to boost circulation.
Wear compression socks if recommended by your provider.
Soak your feet in cool Epsom salt baths to relieve swelling and soreness.
Stay hydrated—yes, again! Ironically, drinking more water helps flush excess fluid from your tissues.
Note: Sudden or severe swelling, especially in your face or hands, can be a sign of preeclampsia. Check in with your midwife if anything feels off.
4. Enjoy Pregnancy-Friendly Summer Foods
Fresh, cooling foods can be both satisfying and nourishing. Summer is a great time to eat:
Hydrating fruits and veggies like watermelon, peaches, tomatoes, and zucchini.
Smoothies with Greek yogurt, spinach, frozen berries, and flaxseed for fiber and protein.
Cold grain salads like quinoa or couscous with chopped veggies and lemon dressing.
Coconut water (in moderation) for a natural electrolyte boost.
Try to avoid overly salty or processed foods that can worsen bloating and water retention. Here are some more healthy pregnancy meals and snacks!
5. Modify Your Movement Routine
Staying active during pregnancy supports circulation, reduces swelling, and boosts your mood—but listen to your body and adapt your routine as temperatures rise.
Try:
Morning or evening walks when it's cooler
Prenatal yoga in a well-ventilated space
Swimming for full-body relief without overheating or strain
Stretching indoors with a fan blowing your way
Avoid working out during peak heat hours (11am to 3pm), and remember to warm up, cool down, and drink water before, during, and after exercise.
6. Protect Your Skin
Pregnancy can make your skin more sensitive to the sun, increasing your risk of sunburn and melasma (the “mask of pregnancy”).
Tips:
Wear a low tox sunscreen if you will be outside for a long time, even on cloudy days.
Use a wide-brimmed hat and sunglasses when outdoors.
Choose shade over direct sun, especially during peak hours.
Look for mineral-based sunscreens with zinc oxide or titanium dioxide if you’re trying to avoid chemical sunscreens.
7. Prioritize Rest and Listen to Your Body
Pregnancy is tiring on its own—and the heat can sap your energy even faster. Give yourself permission to slow down.
Tips:
Nap when needed or go to bed earlier to stay refreshed.
Practice deep breathing or meditation to relax your nervous system.
Let others help with errands, childcare, or housework.
Keep a cool, dark bedroom for better sleep.
Your body is working hard growing a human—it’s okay if your productivity dips this season.
A summer pregnancy doesn’t have to feel like a struggle. If you’re ever unsure about a symptom or need more support, don’t hesitate to reach out to your midwife.
The History and Evolution of Midwifery
Midwifery is one of the world’s oldest professions. Obstetricians did not come on the scene until the 18th and 19th centuries when male physicians began to specialize in childbirth with the belief that they could improve the field with their knowledge of anatomy. Midwifery, on the other hand, has existed since ancient civilizations and has evolved to keep up with modern times while maintaining its core roots.

Ancient Midwifery
Midwives in ancient civilizations were considered respected community healers who guided women through pregnancy and birth. They were often older women valued for their experience, wisdom, and intuition. Their knowledge was passed orally and through apprenticeship, often from mother to daughter.
Archaeological records and texts suggest that midwives were practicing as early as 1900 BC. The Ebers Papyrus, one of the oldest known medical texts, references birthing practices in Egypt and the role of the midwife. Greek philosopher Aristotle referenced midwives in his writings, and the physician Soranus of Ephesus authored a comprehensive manual on obstetrics in the 2nd century CE, offering guidance on prenatal care, labor, and newborn health.
Medieval and Early Renaissance
During the Middle Ages, there was a growing religious and political control that threw many midwives under suspicion of witchcraft and heresy. They continued to serve their communities, some officially employed by town governments, and others operating a more quiet practice.
Although there was a lack of hygiene and modern tools, the midwives’ continuity of care and close monitoring of pregnancy and birth helped many mothers and babies survive. Unfortunately, this era also saw increasing suspicion of women healers - some midwives were persecuted during witch trials, especially if they held herbal knowledge.
1600s-1800s
This era marked the beginnings of formal medicine entering the birthing scene. Male physicians started attending births in the 1700-1800s, especially among upper-class families, often using forceps and new “scientific” methods. Midwives, largely uneducated in these newer methods, were pushed to the margins in some areas, although they continued serving rural and working-class settings.
In cities, physician-attended births introduced interventions - but also infection and mortality rates from puerperal fever. Midwives often had better maternal outcomes with less interventions and risk of infection.
1900-1960s
As hospitals became the standard place to give birth, midwifery was deliberately marginalized in places like the U.S. Physicians labeled home birth as outdated and unsafe, pushing for full control of obstetrics. Formal nurse-midwifery programs emerged in Britain and parts of Europe, but midwives in many places lost legal standing.
Where midwives continued to practice - especially among Black “granny midwives” in the American South - they greatly improved infant survival rates despite limited resources. Meanwhile, hospitals introduced ether, twilight sleep, and the use of routine forceps. Over-intervention often worsened outcomes, especially before sterile techniques were widely adopted.
1970s-1990s
Midwifery saw a reemergence in response to the over-medicalization of childbirth. Homebirth movements, birth centers, and midwife-led care gained popularity once more. Education and certification grew, particularly in nurse-midwifery programs, making midwifery more regulated and recognized.
Research began to show that midwife-led care produced lower rates of intervention and comparable or better maternal and neonatal outcomes, especially in low-risk pregnancies.Countries that integrated midwives into their health systems (like the Netherlands and UK) saw consistent high satisfaction and safety rates.
Present Day
Today, midwives serve in homes, birth centers, and hospitals. Depending on their certification - Certified Nurse Midwife (CNM), Certified Professional Midwife (CPM), or traditional/lay midwife - their scope of practice varies, but the core philosophy remains: supporting physiological birth and informed choice.
Modern studies affirm that midwifery care leads to:
Lower cesarean rates
Reduced preterm birth and low birth weight
Improved maternal satisfaction and breastfeeding rates
Safe outcomes for planned home or birth center deliveries in low-risk pregnancies
When integrated into the health system, midwives fill critical gaps, especially for marginalized and rural populations. The WHO and global public health leaders now recommend midwifery as a key strategy to reduce maternal and newborn mortality worldwide.
Perineal Care After the Birth of Your Baby
Bringing a baby into the world is incredible—and intense. No matter your birth story, your body just did something amazing. One area that often needs some extra TLC afterward is your perineum—the space between your vagina and anus. This area stretches (sometimes a lot!) during birth and may be sore, swollen, or even torn.

Understanding Perineal Tears and Swelling
First things first: some perineal soreness is expected. Even without a tear, the tissue can feel bruised or swollen from the pressure and stretching of birth. If you did experience a tear, it might be a small one that heals on its own or a deeper one that was stitched.
Whether or not you have stitches, gentle care and good hygiene will go a long way toward helping you heal.
Manage Discomfort Naturally
Here are a few go-to comfort measures:
Cold is your friend
Apply a perineal ice pack or a clean pad with crushed ice during the first 24 hours after birth. It reduces swelling and helps numb the area. After the first day, you can switch to using heat on the area.
Take a sitz bath
Soaking your perineum in warm water (with or without herbs or Epsom salts) can bring incredible relief. A sitz bath fits over your toilet or you can use a shallow basin. Aim for 10–15 minutes a couple of times a day.
Try herbal remedies
Herbs like witch hazel, calendula, and comfrey can soothe and support healing. You can apply cooled herbal infusions with a peri bottle or make padsicles (frozen herbal pads).
Keep Things Clean (But Gentle!)
Good hygiene helps prevent infection—but you don’t need to scrub.
Use a peri bottle every time you pee to rinse the area gently with warm water. This helps avoid stinging and keeps things clean.
Pat, don’t wipe. Use soft toilet paper or a clean cloth and pat dry from front to back.
Change pads often (every few hours or sooner if soaked) to keep the area dry and reduce bacteria buildup.
Wash hands before and after touching the area or changing pads, especially if you have stitches.
Support Healing from the Inside Out
Your body is working hard to repair tissue and build back strength. Support it with:
Plenty of fluids to stay hydrated and keep your urine diluted (which stings less!).
Nutritious foods rich in vitamin C, zinc, and protein for tissue repair.
Stool softeners (or fiber-rich foods) to avoid straining when you go to the bathroom. Constipation is common postpartum, and pushing hard isn’t helpful for healing.
Perineal Sunning, an ancient Taoist practice that involves exposing your perineum to sunlight as a method of soaking up vitamin D. Make sure to keep your sun therapy sessions under 5 minutes to reduce the risk of sunburn.
Try different nursing positions when you’ve experienced a painful tear. Sidelying, reclining, or sitting on a boppy pillow are all useful positions to take pressure off the pain point.
Listen to Your Body
Mild discomfort, swelling, and some bruising are all part of the process. But call your midwife or provider if you notice:
Foul-smelling discharge from the perineum
A fever or chills
Excessive pain that isn’t improving
Redness, warmth, or pus around any stitches
Your body will give you signals if something’s off. Trust your instincts and don’t hesitate to reach out.
Give Yourself Time and Grace
Perineal healing takes time—sometimes a couple of weeks, sometimes longer if you had a more significant tear. Try not to rush it. Limit heavy lifting, take breaks to rest, and accept help from your support system. You deserve time to heal.
And remember: postpartum recovery isn’t just physical. This is a tender, transformative time. Treat yourself with the same gentleness you show your new baby.
Signs and Risks of Preeclampsia
In honor of Preeclampsia Awareness Month, we’re sharing how to spot the signs of preeclampsia early and understand what care looks like.
What Is Preeclampsia?

Preeclampsia is a pregnancy complication characterized by high blood pressure and signs of organ dysfunction—most often involving the kidneys or liver. It typically arises after 20 weeks of pregnancy and can affect both mother and baby if not managed promptly. Complications can include seizures, organ failure, placental abruption, preterm birth, and more. Early recognition and intervention are key to having a safe, healthy birth.
Know the Warning Signs
Here are the most common symptoms of preeclampsia to watch for, especially in the second half of pregnancy:
High blood pressure (140/90 mmHg or higher on two occasions, four hours apart)
Severe headaches that don’t go away with rest or hydration
Changes in vision, such as blurriness, flashing lights, or seeing spots
Swelling in the face and hands (sudden or severe)
Upper abdominal pain, often under the ribs on the right side
Nausea or vomiting not related to morning sickness
Sudden weight gain (more than 2–3 pounds in a week)
Shortness of breath or chest pain
Decreased urine output or very dark urine
Feeling generally unwell in a way that’s hard to describe
If you experience any of these symptoms, contact your midwife immediately.
How Midwives Monitor for Preeclampsia
At the Cincinnati Birth Center, preeclampsia screening is a routine part of prenatal care. Here’s how we help detect signs early:
Regular blood pressure checks at every prenatal visit
Urine tests to detect protein, which can indicate kidney involvement
Monitoring swelling and weight gain patterns
Asking about headaches, vision changes, and other symptoms
Midwives are trained to recognize the early signs of preeclampsia and act quickly. Our goal is always to keep you and your baby safe while respecting your birth preferences as much as possible.
What Happens If You're Diagnosed with Preeclampsia?
A diagnosis of preeclampsia changes the course of care. Depending on the severity, your midwife may:
Collaborate with an obstetrician to continue care under a shared model
Transfer care to a hospital setting for closer monitoring and access to interventions
Support you through an induction or medically necessary birth if symptoms worsen or you reach full term
We understand that this can be an emotional pivot—especially when you've envisioned a peaceful, out-of-hospital birth. We’re here to guide you every step of the way and ensure you feel informed, empowered, and supported throughout the transition.
Can I Still Have a Natural Birth?
In some cases of mild preeclampsia, and with close medical oversight, vaginal birth may still be possible—just not at the birth center. Your midwife can remain a supportive part of your care team even if you transfer to a hospital, offering continuous emotional support and helping to advocate for your birth preferences wherever possible.
Reducing Your Risk
While preeclampsia isn’t entirely preventable, certain factors can help reduce your risk:
Attending all prenatal visits
Eating a well-balanced, nutrient-rich diet (focus on magnesium, vitamin D, and omega-3s)
Avoiding seed oils
Staying hydrated and active as advised by your provider
Managing preexisting conditions like high blood pressure or diabetes
Not ignoring symptoms—trust your instincts and reach out to your care team with any concerns
You’re Not Alone
Preeclampsia affects about 5–8% of pregnancies, and most cases are manageable when caught early. The most important thing is staying connected to a care team you trust—one that listens to your concerns, honors your choices, and prioritizes your well-being.
In honor of Preeclampsia Awareness Month, let’s keep the conversation going. Ask questions. Learn the signs. And know that midwifery-led care is rooted in both intuition and evidence, ensuring you’re supported no matter what your pregnancy journey brings.
Have questions about preeclampsia or birth center care? Reach out to our team—we're here to support your journey with confidence and compassion.
VBAC at Home - What You Need to Know
Before the month ends, we want to give a shoutout to April as Cesarean Awareness Month, a time to advocate for informed birth choices and celebrate the many paths to a safe and empowered birth experience. For many parents who have had a prior cesarean, vaginal birth after cesarean (VBAC) is a viable option—and it is one that you can absolutely pursue at home with the support of a skilled midwife.

Can You Have a VBAC at Home?
Yes, for many women, a home VBAC is a safe and viable option. The key is careful risk assessment, choosing an experienced midwife, and ensuring you meet the criteria for a safe out-of-hospital birth. While hospital-based VBACs are more common, many women prefer birthing at home to avoid unnecessary interventions, labor in a familiar environment, and have a more autonomous birth experience.
Key Factors for Home VBAC Eligibility
A midwife will assess your health history, prior birth experiences, and overall pregnancy to determine if you're a good candidate. Some factors that support a safe home VBAC include:
A low-transverse uterine incision (the most common type, which has the lowest risk of rupture).
A healthy pregnancy with no major complications (e.g., preeclampsia, placenta previa).
An adequate interpregnancy interval, ideally 18-24 months between deliveries.
A previous vaginal birth, which increases VBAC success rates.
A supportive birth team, including an experienced midwife with hospital transfer protocols in place.
If you have any concerns at all, talk with your midwife! She will be happy to cover all your options and go over the best plan for your specific situation.
Benefits of a Home VBAC
Choosing a home VBAC can offer several benefits, including:
Avoiding unnecessary interventions that might increase the risk of repeat cesarean.
A more comfortable labor environment, where you can move freely and follow your body's instincts.
Personalized, continuous support from a midwife who trusts your body’s ability to birth.
Lower risk of infections associated with hospital settings.
A peaceful postpartum transition, with immediate bonding and uninterrupted skin-to-skin contact.
Understanding the Risks
While VBAC is a safe option for the vast majority of women, it does come with risks that need to be acknowledged:
Uterine rupture (an extremely rare but serious complication, occurring in about 0.5-1% of VBACs). Talk with your midwife if you have concerns in this area.
Potential transfer to a hospital if complications arise.
Limited access to emergency interventions at home.
A qualified midwife will continuously monitor for warning signs and have a transfer plan in place to ensure you receive emergency care BEFORE complications arise.
Keep in mind, having a VBAC does not make you a high-risk client, which means you are usually eligible for midwife care and a home birth.
Preparing for a Home VBAC
If you're planning a VBAC at home, consider these steps to increase your chances of success:
Choose an Experienced Midwife
Find a midwife with VBAC experience and a strong emergency protocol.
Discuss their transfer plan and relationship with nearby hospitals.
Educate Yourself
Read VBAC success stories to build confidence.
Learn about the physiological process of labor and how it differs after a cesarean.
Take a childbirth class focused on VBAC and home birth.
Prioritize Optimal Fetal Positioning
Practice spinning babies exercises to encourage a good fetal position.
Stay active and use positions that support optimal engagement in the pelvis.
Ensure a Supportive Birth Team
Have a doula or support person trained in VBAC births.
Prepare family and friends for your birth choices and tune out any negative responses.
Have a Backup Plan
Know the nearest hospital and their VBAC policies.
Pack a transfer bag just in case.
A home VBAC is a deeply empowering and transformative experience for many mothers. If you’re considering a home VBAC, take the time to educate yourself, consult with experienced midwives, and trust in your ability to birth on your own terms.
Ohio Senate Bill 140
Ohio Senate Bill 140 has been formally introduced and seeks to improve access to freestanding birth centers by addressing the long-standing issue of hospital transfer agreements. Under current regulations, all birth centers in Ohio are required to maintain a written transfer agreement with a local hospital—an administrative hurdle currently preventing the Cincinnati Birth Center from fully opening.
A question many have is: but what about when transfer is a necessity? Wouldn’t a hospital transfer agreement create a smoother transition?
Actually, the requirement is a redundancy that simply creates a barrier to a family’s choice of provider. Let’s take a closer look.
The Redundancy of the Transfer Agreement Requirement
As requirements currently stand, a birth center must hold a written transfer agreement with a local hospital in order to open its doors. However, many hospitals, particularly those with obstetric departments, are unwilling to enter into these agreements—often because birth centers are viewed as competition. This creates an artificial restriction on the establishment of new birth centers and limits choices for families seeking out-of-hospital birth options.
In reality, birth centers already have well-established protocols for emergency transfers. Midwives are highly trained in risk assessment and are skilled at identifying when a laboring person or newborn may require a higher level of care. Transfers, when necessary, are carefully planned and executed for a seamless transition to hospital care.
The idea that a birth center needs an agreement with a hospital to safely transfer a client ignores the fact that hospitals are already legally required to accept and treat any patient in an emergency. This is a redundancy that has been abused by the medical system in many scenarios.
The Revised Bill: Creating Stronger Protocols without Barriers
The revised version of Senate Bill 140 acknowledges the importance of having a structured transfer process without imposing unnecessary administrative red tape. Under the new framework, birth centers will be required to have a written transfer plan with clients. This plan will outline the process for hospital transfers, ensuring that every family understands what will happen in the rare case that higher-level medical care is needed.
Additionally, many birth centers already work with clients to pre-register with a local hospital. This proactive approach ensures that, in the event of a transfer, hospital staff have all necessary medical records on file, allowing for a smoother transition and minimizing delays in care.
